Glow-in-the-Dark Alien Babies


Alien BabiesHere’s a project that’s super easy to do, a good craft for parties or a fun decoration for Halloween or off-the-wall baby showers.

Supplies:

  • For each alien baby, three colors of polymer clay in glow-in-the-dark colors or colors of your choice.
    • You’ll need about 1/8 block of clay for each head, about 1/4 block of clay for each blanket, and a tiny amount for the eyes.
    • If desired, small beads or paint can be used to make eyes instead of clay.
  • Baby accents – tiny plastic rattles, bottles. These can often be found on the favors aisle of craft or party stores
  • E-6000 adhesive.
  • Assorted tools: rolling pin, toothpick, craft or plastic knife, ear swabs, cookie sheet (preferably an old one not used for cooking), paper bag.
  • Optional: Pin backings if making jewelry, wreath and ribbon if making an alien baby wreath, narrow ribbon if making hanging ornaments.


Making the head

Knead a small amount of each color of polymer clay until it’s pliable

For each head, roll a ball of clay about 3/4″ in diameter

Pinch and roll one side of the ball until it’s smooth and slightly tapered.

With a moist ear swab (moistened with water so it won’t stick to the clay), poke eye sockets into the head.
AlienEyes

Make the eyes

Roll two balls of clay approx. 1/8″ in diameter.

Note: If you don’t wish to make the eyes out of clay, you can instead glue on beads or paint on eyes after the alien baby has been baked.

Pick up the eye balls one at a time with a toothpick and place in the eye sockets. Notice that the toothpick will poke holes in the balls, which makes nice pupils.

Mash the eyes into the sockets slightly so they’ll stick.

Make the blanket

No baby, even an alien baby, is complete without a receiving blanket.

Roll out a blob of clay between two sheets of waxed paper so that it’s 1/16 – 1/8″ thick. (The waxed paper helps to protect your work surface and the rolling pin – you really don’t want polymer clay in direct contact with items you use for food preparation.)

With a craft or other knife, trim the clay so that it forms a 3″ square. (You don’t have to be totally precise about the measurement or making it square.)

Carefully peel the “blanket” loose of the waxed paper.

Optional: If you’re going to hang your baby as an ornament, poke a hole for ribbon near the corner that you’re going to put at the top. A plastic straw works pretty well for this.

Place the head on the blanket.

Fold up the bottom of the blanket.

Fold over the right-hand side of the blanket.
Fold over the left-hand side of the blanket. Check to be sure you’re happy with how the head is positioned in the blanket.

There! Your alien baby is tucked in nice and cozy!

Bake the alien baby in the oven as directed on the package of clay. If you’re placing the alien baby on a cookie sheet you use for regular food preparation, line the cookie sheet with a plain brown paper bag so that it won’t come into contact with the clay. Some also recommend using a toaster oven specifically devoted to crafts rather than the oven you use for cooking. Read one set of scary opinions here and read a different, contrarian set of opinions here.) Regardless of what you do, be sure your baking space is very well-ventilated.

Finishing details:

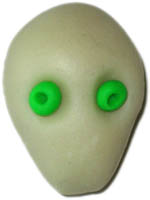
Once the alien baby has cooled, glue on any props like baby bottles or rattles. Double check to ensure the alien head is sticking to the blanket and the eyes are sticking to the head. If not, simply glue them in place with a dab of E6000.

How to use your alien baby:

. Jewelry – glue a pin backing on the back.
. Wreath – glue to a wreath and add ribbon and coordinating accents.
. Hanging ornament – poke a hole in the top corner of the blanket before baking, and run a ribbon through it afterwards.
. Make your own horror movie with Barbie dolls or action figures. Also great for small seasonal dioramas.


LEAVE A REPLY

Please enter your comment!
Please enter your name here