 |
|
Ho ho no! Santa went down the wrong chimney!
Guess the steam curling out of the ventilation stack fooled him!
This one of a kind, heirloom quality holiday decoration can be yours with very little effort. Essentially it’s a paint by numbers exercise, although you’re welcome to add your own creative touches. |
| |
|
|
 |
|
Supplies:
. The cheapest toilet seat you can find that will fit your biffy; we recommend plain old white for paintability.
. A rough scrubbing pad, as shown in the next image.
. Assorted paintbrushes and paints. Red, white, black, and blue are good colors to start with. Add others as desired.
. Clear spray paint, if desired. This will help protect the paint job after you’re finished.
. Our downloadable pattern.
|
|
|
|
 |
|
Preparing the Lid:
Roughen up the center of the lid a bit with the scrubby pad. You don’t have to scrub too hard or too much; just enough to dull out the finish. This will help the paint stick on better.
|
|
|
|
 |
|
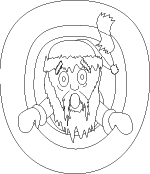
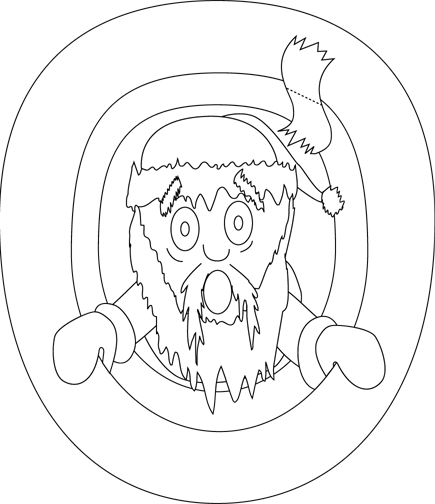
Download the Pattern:
It’s available in gif or eps. Most households don’t have a printer which will print out one piece of paper big enough to cover the toilet seat. Therefore, we’ve shrunk our pattern by 50% in each direction
We recommend printing it out, then taking it down to a copier and enlarging on several pages to fit your toilet seat. 200% ought to do it, but don’t take our word for it – experiment so it fits on your seat! |
|
|
|
 |
|
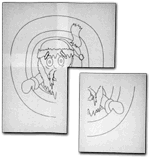
Stick the Pattern Together:
We don’t have a big enough printer ourselves, so we’ve taken the enlarged 8 1/2 x 11″ sheets and have taped them together. To match the pattern up, it helps to trim the edges of the paper flush with the design. Too bad we didn’t show this very well in our photo! Oh well – guess you get what you pay for.
When you’re done taping the pattern together, cut off the excess paper around the edge. |
|
|
|
 |
|
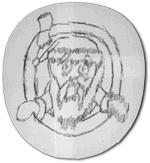
More Pattern Preparation:
We don’t have any tracing paper around and we don’t like the stuff anyway. Happily, a cheap substitute is available as close as your desk drawer.
Simply flip the pattern over and, with a charcoal or soft pencil, scrub back and forth over the pattern lines. You may have to hold your pattern up to a light occasionally to see where the lines are.
Actually, this looks pretty good as is. Doesn’t Santa look haggard? (And well he should if he’s bumbling around in people’s toilets.) |
|
|
|
 |
|
Tape -n- Trace:
Turn your pattern back over, charcoal or penciled side down, and tape it to your lid. With a sharp pencil or ink pen, trace over all of the dark lines. When you remove the pattern, you should see the design reproduced on the lid of your toilet seat.
Paint between as desired. For added durability, spray on several layers of clear acrylic after the paint is totally dry. |
|
|
|
|
|
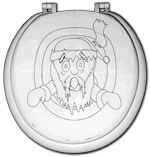
The Finished Seat
Here’s what we ended up with. Notice that we got lazy and didn’t bother to paint in the draping toilet paper in the upper right hand corner. We got bored.
When yours is done, just remove your regular seat and install this one.
Roto Rooter®, anyone? |
|
|
|
Variations:
- Yours may turn out so wonderful that you want to share it with the neighborhood! If so, simply hang it on your front door in lieu of a wreath.
- Glue on googly eyes, available at the crafts store, instead of painting pupils.
- If country decor is your thing, try using the pattern to cut out appropriate bits of fabric, patchwork style. Glue them to the toilet seat. Apply bits of fake fur for the beard and other soft areas.
|

")


