Cheap! Easy! Tacky! When entertaining family or friends during the holidays, it’s so important to have the right decorations – decorations which will set the mood and be remembered for years!
 |
|
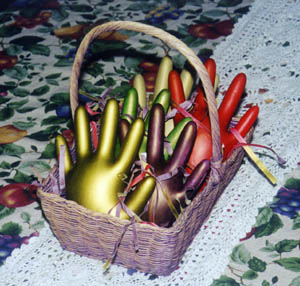
This stunning centerpiece is oh-so-easy to make and sure to please! Simply follow our directions for creating plaster hands, the basis of the project, then decorate as desired. |
|
|
|
|
Making the hands… |
|
|
|
 |
|
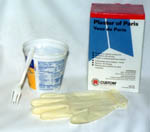
Supplies:
. Plaster of Paris; one box makes about six hands
. Latex gloves
. Old, nasty mixing container
. Old, nasty stirring device
. Water
. Twisty ties, clamps
. Acrylic paint, basket, decorations
|
|
|
|
 |
|
Preparations
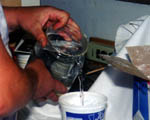
To stave off air bubbles in the finished hands, fill your gloves with water, then empty them.Read over the directions for the plaster and get the necessary amount of water ready in your Old, Nasty, Mixing Container |
|
|
|
 |
|
Add Plaster
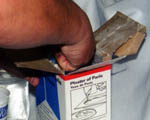
Add the plaster powder, a bit at a time, to the water. Mix between each addition. You should end up with a mixture which is fairly thin but has some substance.
|
|
|
|
 |
|
Pour
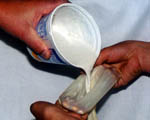
It helps to have someone hold the glove open for you. (Unlike in this photo, where the person is stretching and almost breaking it. Thanks a lot.)Pour plaster down each of the fingers and up to the end of the palm of the glove. |
|
|
|
 |
|
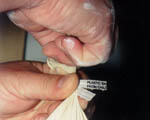
Twist Closed
Twirl the open end of glove around a few times, then secure it with a twisty-tie. If you drop the glove and its contents spill, you’re permitted to swear if no children are present.
|
|
|
|
 |
|
Harden
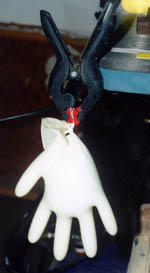
Lay the hands down to harden, or if preferred, clamp on to the twisty-tie and hang the clamp on any horizontal rod you have handy. The handlebars of expensive mountain bikes or tables of pricey power tools work well for this purpose.As the hands harden, you’ll notice that they get rather warm. This is because an exothermic chemical reaction is taking place. |
|
|
|
 |
|
The Hardened Hands
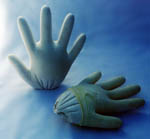
These hands have set up and are ready to dry for a few days to a week. Notice that the one on the right is still having its glove removed. If the gloves are removed carefully, they can be used several times.(We will leave experiments involving the filling of other latex objects as an exercise for the reader.) |
|
|
|
| Finishing Up… |
|
|
|
 |
|
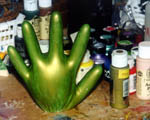
Decorate
Now that you have several hands, they can be decorated however you like. (For more ideas, see the end of this article.) We’ve chosen to paint ours, picking up the colors in a favorite tablecloth.Spray painted finishes with a clear coat to make them more durable; otherwise, they’ll scratch. |
|
|
|
 |
|
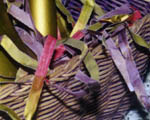
Accessorize
We’ve made coordinating “grass” to fill in around the hands by painting typing paper with the leftover dregs of paint after each painting session, then running the dry sheets through an office shredder. Ribbons also look great, as do contrasting painted Band-Aids wrapped around a few fingers.
|
|
|
|
 |
|
The Finished Project
We already had a favorite basket, and simply arranged the hands and accessories in it to please.Wow! Won’t your family be amazed?! |
|
|
|
| More Ideas … |
|
|
|
Plaster hands are a truly versatile decorating accessory! We’re confident that once you start working with them, you’ll come up with variations of your own. In the meantime, here are some of our favorites:
- Easter – paint hands in pastel pink, yellow, and blue, and surround with “easter grass”. Remember, you can make your own “easter grass” in custom colors with a paper shredder.
- Halloween – leave hands white and ghostly. Glue on assorted googly eyes. Arrange in a hideous basket; fill in cracks with Fimo spaghetti.
- Party Favor – give out decorated plaster fingers. To make fingers, simply fill latex gloves up to finger level rather than palm level. These fingers also look great and rather obscure when standing on end on a desk or in a kitchen. (Oops! Guess that paring knife slipped!)
- Theme for a party – make plaster hands ahead of time. Pair with supplies for decorating them, some loud music, and you have a party!
- Anniversary – instead of hanging the hands to dry, lay them palm down so that one side is a bit flat. Once dry, drill a hole in the reverse side to hold a brass candle cup, and decorate to suit. Very romantic!
- Spring – Sand the end of the hand down so that it will stand on end. Drill small holes in the fingertips to hold dry or silk flowers. Paint or decorate as desired, then glue in the flowers.
- Monster – With a mouth painted in the palm, the fingers become horns.
- Tree – Sand the end of the hand down so that it will stand on end. Paint as desired. Twirl moss or green “Easter grass” among the finger “branches”. Accent with a fake craft store bird. Grandma would be so proud!
|
|