 Although a wide variety of wedding cake toppers can be special ordered on the web, the ones found at crafts stores are often limited to two varieties: generic plastic Caucasians and generic plastic African-Americans. Anyone who has a different hair or skin color or a different hair or clothing style is out of luck. Even for the groups that are depicted, the toppers are no more representative of 99% of the couples than a pair of dogs dressed in wedding attire.
Not to worry. Standard-issue cake toppers should be regarded as only a starting place. With a little paint, some white putty, and some tools you can customize your topper so that it’s a more accurate memento of your wedding.
We’re going to show you how to do a very basic modification to demonstrate how simple it is to change hair styles, attire, and body types.
Those who have ample time or are feeling intrepid can experiment with making toppers from scratch using model kits as a starting point. Why not saw off the heads and arms off a stock cake topper and replace them with ones from a model kit, or even create your own? A good reference on military or figure modeling will prove invaluable if you decide to try this. Look for a book that includes instructions for changing the poses of stock figures.
Supplies:
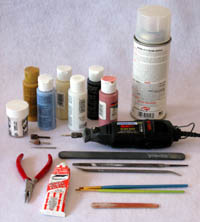
• Plastic cake topper
• White modeling putty, such as Squadron
• Assorted modeling tools such as files and a Dremel
• Acrylic craft paint and brushes
• Clear acrylic spray paint
• Dust mask and goggles or face shield
![]()
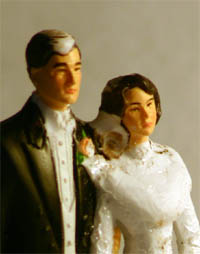
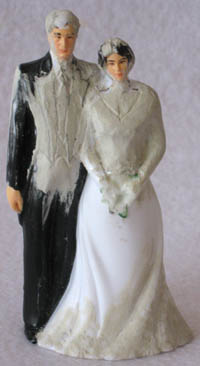
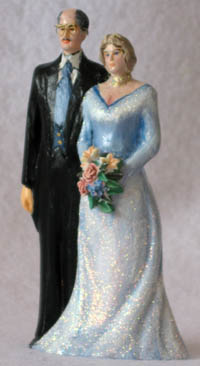
The Happy Couple
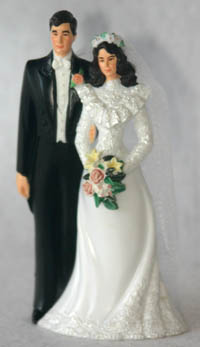 Here’s our starting point, an inexpensive 4″ high plastic cake topper with the hopeful moniker “Lasting Love”.
The flounce around the bride’s shoulder’s was last seen fleeing a high school prom in the 1980s. The cake topper company must have made a huge investment in tooling: they can’t be redoing their molds every twenty years just because styles change!
What’s that thing around the groom’s neck? A vampire butterfly? That has to go. A traditional necktie is a symbolic penis. Let’s not emasculate the groom on his wedding day by sticking him with a wimpy little bow tie.
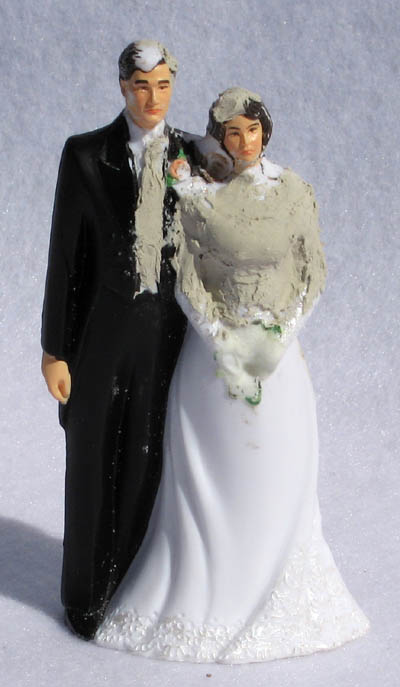
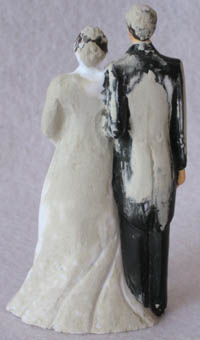
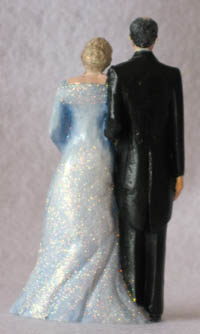
The view from the rear
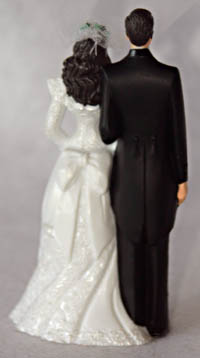 Aren’t giant butt bows usually something that’s done to bridesmaids to make sure they’re uglier than the bride? On the other hand, maybe this bride needs it so her shoulder flounce won’t topple her over.
Now that we’ve met our generic plastic couple, let’s think about what we want to change.
Our real life couple are Caucasians in their late thirties/early forties. Both of them have spent a great deal of time indoors in front of computer monitors, resulting in pasty white skin and a lack of muscle tone rarely seen outside the sloth house at the zoo.
The groom is very nearsighted and wears glasses. The hair on the top of his head is only a distant memory, having long since decided to explore the shower drain.
The bride’s waistline is also a thing of the past, making her grateful that the groom’s eyesight is poor. Her hair is a dirty blonde, and she plans on wearing it up for the wedding. She’s not going to wear a veil since this is not her first trip down the aisle.
With the profile of our real life couple in mind, let us begin work.
The butt bow must go!
 First we remove any extraneous glued-on bits like bouquets and veils.
Next we use a cylindrical sanding band on a Dremel to remove the hideous butt bow and much of the plastic bride’s long hair. With discrete sanding and augmentation with putty, her hair will be styled into a bun on the back of her head.
… and so must the bow tie
 Using a variety of Dremel bits, we remove the bride’s shoulder flounce, cut away some of her long hair, and evict the vampire butterfly that was attached to the groom’s throat.
We also begin to recede the groom’s hairline a bit. The African-American version of this figure would have provided a nicer place to start in that respect. In that version the groom’s hair is evenly distributed over his head rather than molded into a phony side-parted imitation of “executive hair”. That makes it a little easier to just sand off a bit of hair to reveal the plastic scalp below.
In the detailed areas we substitute a tapered grinding stone for the band sander. This is no doubt a blatant misuse of the grinding stone and a good argument in favor of buying the huge cheap Dremel bit sets at the local discount warehouse.
Putty time
 The bride and groom look incredibly serious. Is it because they’re about to take sacred vows, or is it because an entire flock of seagulls crapped on their heads? Regardless, it’s time to crack open that tube of white putty.
The real life bride is quite chunky, so we apply a generous amount of putty to the plastic figure’s waistline and upper arms.
We also add white putty to the front of groom to form a neck tie.
Note that the puttied areas look quite rough at this stage. Not to worry; we’ll be smoothing them out. Making modifications is an iterative process, requiring multiple rounds of puttying and sanding.
![]()
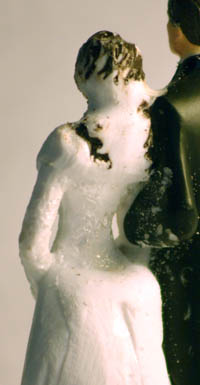
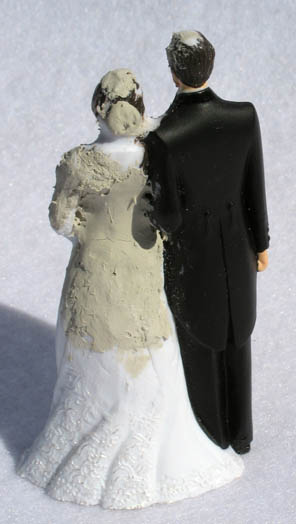 A view of the bride from the back. Note the fatter arms and thicker waist. We’ve also added a blob of putty on the back of her head to form her chignon.
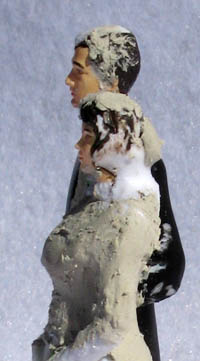 A view from the side, showing how much weight the bride has gained. The groom remains steadfast, however, literally molded to her side. Maybe this is what is meant by “the two shall be as one”. Or perhaps he simply can’t get away because she has him in a death grip.
One compensation for getting fat is that sometimes you grow a chest. We went ahead and built up that area when we thickened the bride’s waist.
One thing we haven’t done, because it would require a very fine touch, is to modify the couple’s facial features. We have daubed a tiny bit of putty around the bride’s jowls, however.
![]()
A-sandin’ we shall go!
 Here we are after a couple of iterations of puttying and sanding.
Notice that the front of the groom is entirely white now. Thanks to the miracle of white putty, he has been made a bit more portly. When making extensive modifications like this, we found it helpful to putty and sand the areas to get their general shape, then make pencil marks as guides wherever we wanted more detailed carving.
We have also altered the neckline of the bride’s dress. She’s trying to highlight her cleavage so as to attract attention away from her waist.
![]()
 A view of the back.
![]()
 A view of the groom’s reshaped “putty belly”.
After we smooth down any remaining rough edges we’ll be ready to paint.
![]()
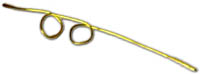 At left, a pair of miniature eyeglasses for the groom is under construction. We’ve used 32 gauge brass wire and bent it around the tips of round nose pliers to make “lenses”. After comparing the glasses to the groom’s face, the frames are bent, trimmed to length, and glued to his face. (No real grooms were harmed in the construction of these glasses.)
“… and the bride carried a bouquet of plastic roses”
 At left we see the finished bride and groom after a few coats of paint and a spray coat of glossy acrylic. We’ve also gifted the groom with a paint moustache, glued on his glasses, and touched up the bride’s bouquet with paint and glued it back on.
The real life bride, wanting to wear a gown that was less traditional than plain white, opted for a dress with blue undertones and festooned with crystals. (One benefit of being older when you get married is that you can afford a really fancy dress.) This is simulated by painting the plastic gown in shades of blue, then covering its skirt and upper bodice with a thin coat of pearlescent paint. Ultra-fine crystal glitter is then sprinkled into the pearlescent coat while it’s wet. A layer of gold paint sprinkled with glitter forms a choker.
Should you try this and be worried about glitter flaking off into your wedding cake and gagging Aunt Flossie, don’t. Several spray coats of clear acrylic cement the glitter in place quite well.
Flesh tones for this couple are created by blending a base tone of ivory with a touch of dusty rose. A selection of colors such as ivory, dusty rose, Van Dyke Brown (very deep brown), Burnt Umber (a deep to medium brown), yellow ochre (golden brown) and Burnt Sienna (brick red) will help simulate a variety of skin tones. When in doubt, pay attention to the color that’s actually in the bottle and ignore its label. Labels such as “flesh” are almost universally unhelpful, about as representative of anyone’s real skin color as a “flesh” colored Band-Aid.
![]()
 The finished figures seen from the back.
![]()
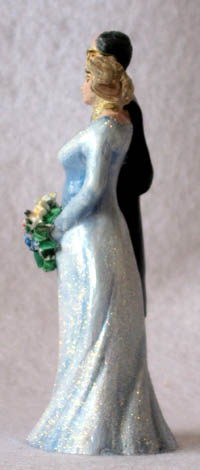 The view from the side.
There you have it – with a little paint, putty, and some sanding you have quite a different figurine. If we can do it, you can too!
")


